
How To Make the Perfect Paper Airplane


POP Projects is a collection of new and classic projects from more than a century of Popular Mechanics. Master skills, get tool recommendations, and, most importantly, build something of your very own.
Ah, the paper airplane. A project that appears simple at first glance but is devilishly complex when you actually want your stationery aviation creation to fly a bit further than a few feet. So what are the right folds, cuts, and edges needed to created the perfect paper plane?
In 2017, we spoke with Barnaby Wainfan, a technical fellow and aerodynamicist at Northrop Grumman, who gave us a few pointers. On April 22, 1993, the FMX-Facetmobile, a homebuilt plane of Wainfan's creation, flew for the first time, sporting a design that's a mix between an F-117 Nighthawk and, well, a paper airplane.
Here's how to make a paper plane that's guaranteed to dominate your living room skies.
The Plane
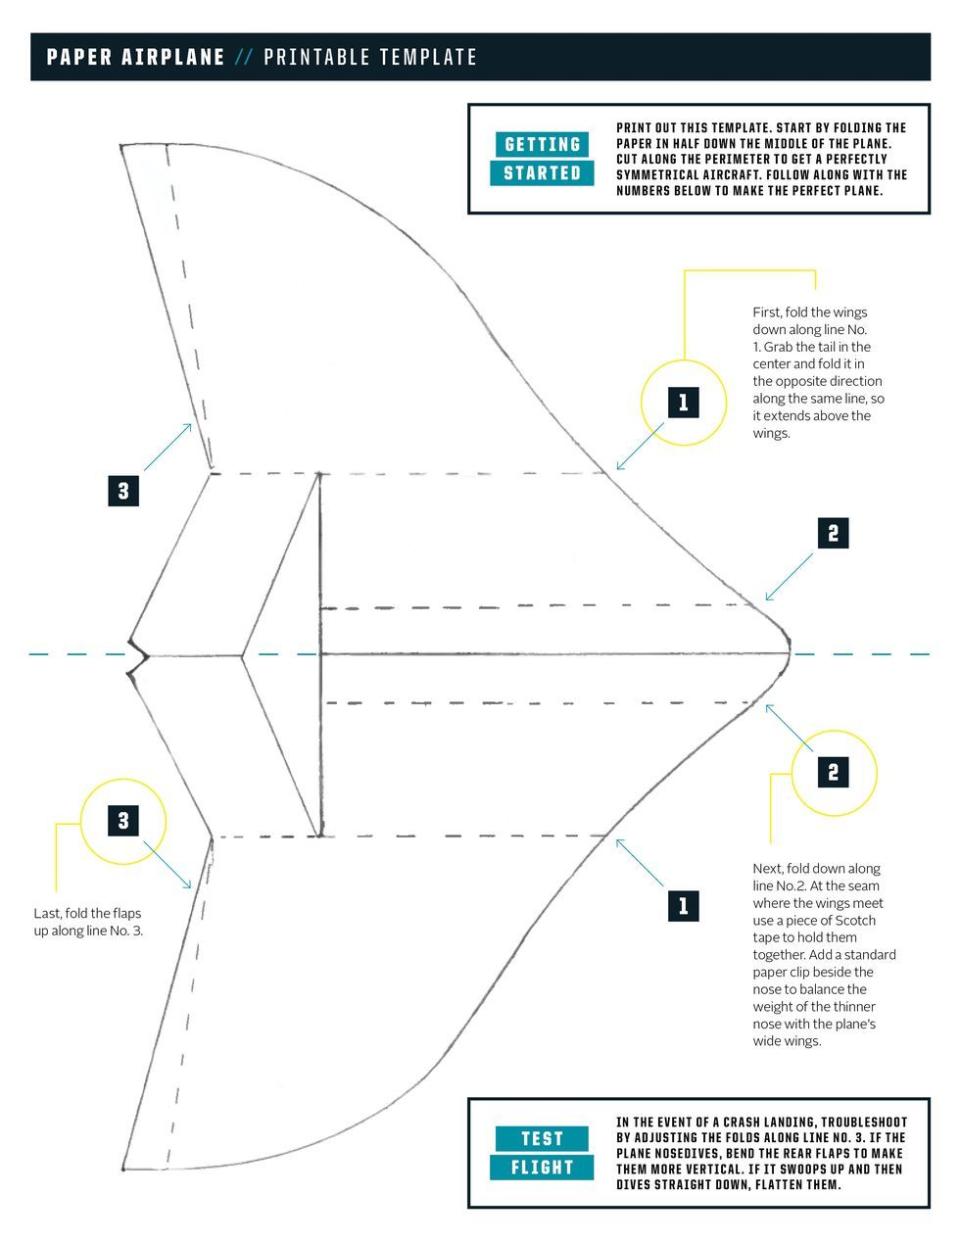
Start by folding the paper in half down the center of the plane. Cut along the perimeter to get a perfectly symmetrical aircraft.
Now fold: First, the wings, down along line No. 1. Then grab the tail in the center and fold it in the opposite direction along the same line, so it extends above the wings. Next fold down along line No. 2. At the seam where the wings meet use a piece of Scotch tape to hold them together. Add a standard paper clip beside the nose to balance the weight of the thinner nose with the plane's wide wings. Last, fold the flaps up along line No. 3.
After a test flight, troubleshoot by adjusting those folds. If the plane nosedives, bend the rear flaps to make them more vertical. If it swoops up and then dives straight down, flatten them.
The Launcher
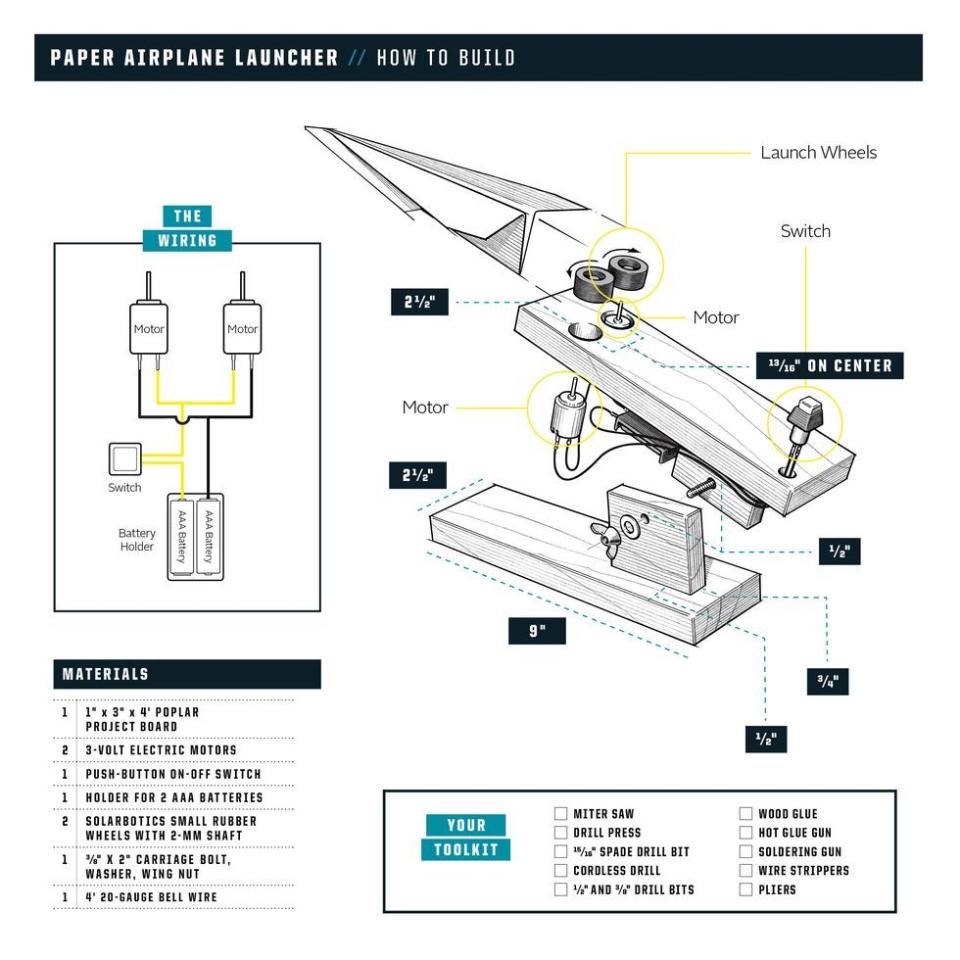
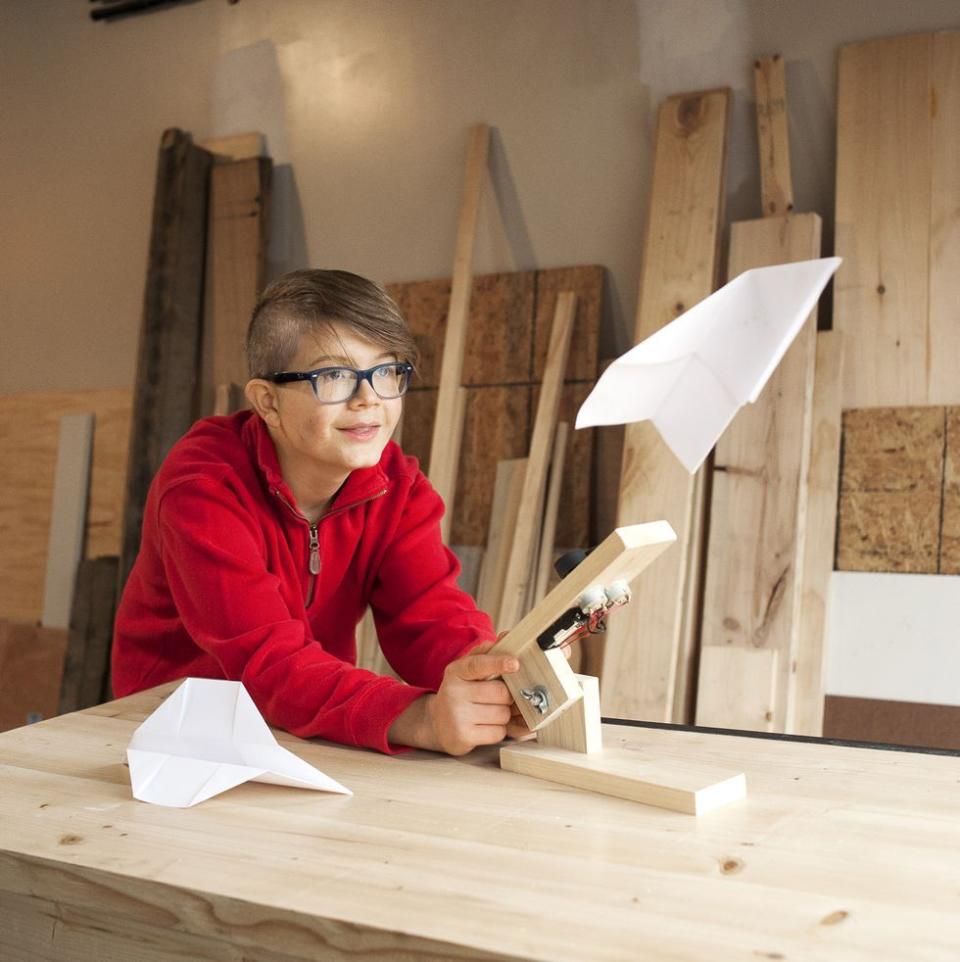
Sure, you could fling your perfectly created paper airplane with your own human muscles, but it's much cooler to build a machine to do it for you. This design uses a few robotics parts, a little bit of soldering, a few chops with the miter saw. But in about an hour, you'll have a machine purpose built for some airplane flinging.
A Few Special Parts
These Tools Will Help
The 9-Step Build Process
You Might Also Like

