
This Cyberpunk 2077 Side-Quest Is One Of Its Best, So Don't Miss It
Venturing off the path of the main quest in Cyberpunk can feel a little…perhaps ludonarrative dissonant? Sure, V’s got a lot on their plate, but there’s a whole city out there filled with quests and objectives. Not all are made equally though. If you want to experience one of the best side diversions this dystopian futurescape has to offer, however, it’s time to get reacquainted with an AI taxi service you met in Act One. Turns out they’ve got a bit of a staff problem; good thing you’re in need of eddies and have time to spare.
Act Two opens with such a heavy narrative premise that it’s easy to get immersed in the main story. Who has time for fetch quests when the clock is ticking on impending doom? This is especially the case when much of the game can feel like a GTA-wannabe at worst. But the quest chain that follows “Tune Up” is filled with such personality and offers such a classic sci-fi AI premise that you shouldn’t miss it. In fact, it should be top of your list of quests to grab once you wrap up “The Heist” main job.
Read more
Billie Eilish Fans Are Not 'Happier Than Ever' About Her New Boyfriend
Physicists Got a Quantum Computer to Work by Blasting It With the Fibonacci Sequence
You need to be in Act Two to access this quest. Act Two follows the trying events of “The Heist” main job, so we’re gonna be in spoiler territory here. Also, as a content warning, this quest does deal with themes of self harm and suicide. Make sure you have an Intelligence score of at least 10 in order to access all outcomes at the quest’s conclusion.) It’s worth pausing the main storyline for this one.
It all starts with the “Tune Up” side job, which will take you a little by surprise before you’ll be on your way to hunt down individual objectives scattered around the city. You have two choices for how you want to tackle this quest: Either knock all of the seven objectives out one-by-one, or, dip in and out of them as you progress through the main story or other quests. Some of the shootouts can get a little rough if you’re not leveled up appropriately, specifically the one that takes place in Pacifica.
Let’s dig in.

How to start the Delamain side-quest
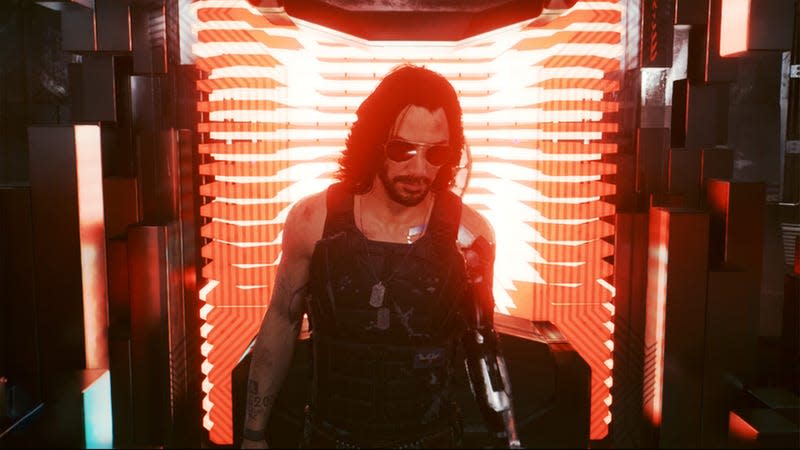
Your choom is dead, a cigarette-smoking rebellious rockstar is stuck in your head, and a stolen piece of hardware from Arosaka is slowly overriding your consciousness. Isn’t the future grand? Act Two arrives after one hell of a turn of events and all you might care about after waking up is where the hell your car is.
Lucky you: If you check your journal or map, you’ll come across the “Tune Up” side job, where the first objective is to retrieve your vehicle from your apartment’s parking garage.
After the very impolite car smashes into you and wrecks your ride, you’ll be wheel-less for a spell. Don’t worry, you can either grab one of the purchasable vehicles as a temporary replacement (yes, you’ll get your wheels back).
Alternatively, if you’re looking for a free set of wheels and don’t mind a quick trip out to the desert, you can score a Colby CX410 Butte for literally free at the following location:
It’s not the fastest car by any means, and the acceleration is rather slow, but what do you want for nothing?
Finish up the remainder of “Human Nature’s” tasks and you’ll be able to access the “Tune Up” side job. This one will take you down to Delamain HQ, where you’ll understand a bit about what just happened.
After chatting with Delamain a bit, you’ll come to find out that a number of his cars have gone rogue. It’ll be up to you to track them down.
Finding the rogue Delamain car locations (and how to drive in first-person without crashing)
Time for a seven-step fetch quest! Don’t close the browser, trust me, this one’s worth it. For the best experience, however, I really recommend driving in first-person mode. To avoid smashing into things left and right while driving in first-person perspective, make sure your map is on and use it as a kind of peripheral vision.
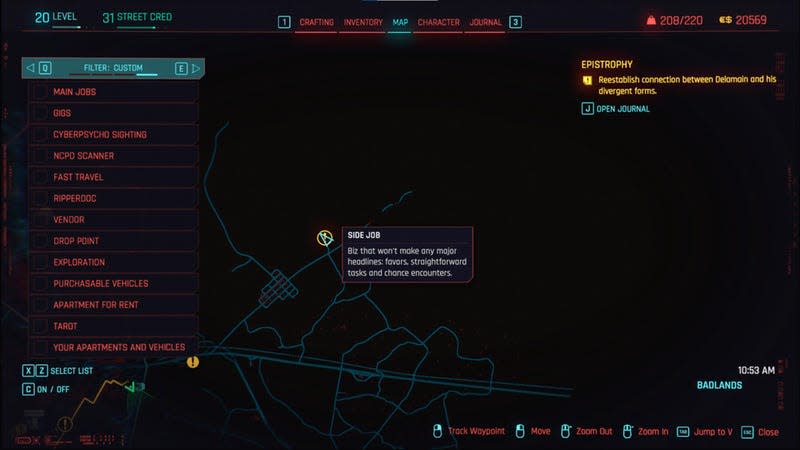
Once Delamain gives you the rundown of what’s going on, you’ll have access to the seven-step “Epistrophy” side job. You can go to each location as you wish, knocking them out one-by-one, or choosing to grab them when they seem appropriate. If you want to leave this quest as something you’ll return to on and off, you don’t need to worry about tracking it too often. Delamain will call you whenever you are near the vicinity of one of the rogue vehicles. It will take a little while to find some of them depending on their location. Stay within the highlighted area in your minimap until you find the car and stick close to them once you’ve found their location. They can be found in the following places:
Wellsprings
Northside
North Oak
Rancho Coronado
Badlands
The Glen
Coastview
Some of the more notable parts of this quest include the Rancho Coronado, Wellsprings, and North Oak locations. In North Oak, you’ll need to drive the rogue cab back yourself, except this AI is particularly nervous about the city. Keep the car under 50 to not spook him too much.
Rancho Coronado will have you engage in some amusing property damage to satisfy an AI who’s very upset about some pink flamingos. Meanwhile, the AI in Wellsprings has a bit of an attitude. It might feel clunky, but I recommend sticking to first-person during the car battle here as, given the camera perspective, an impromptu 1v1 demo derby in the middle of a city is quite fun and poses a bit of a challenge.
If you’re heading to Pacifica for the Coastview location, however, come leveled up and stocked on ammo. After an amusing easter egg, you’re gonna get jumped by a bunch of gonks. I recommend staying under the bridge during this shootout, as there are two groups of hostile enemies outside of the bridge who can easily get roped into the shooting spree. Fighting one group of fools is much more manageable than taking on three.
As a note, “The Glen” location involves a conversation about depression and self harm.
Final Delamain quest: “Don’t Lose Your Mind”
Once you gather all of the rogue AI’s and send them back to Delamain HQ, you’ll have to wait a couple of days to receive a suspicious call from Delamain. This call usually triggers by visiting Corpo Plaza. Turns out, Delamain has found the source of the problem: A virus has hit the AI and you’re being called on to help.
As you’ll quickly learn, entry into Delamain HQ isn’t as straightforward as it was before. Once you find a way in around the back, you’ll move through some abandoned offices. Take the time to sift through the computer emails for a bit of dystopian backstory about what happened to the human staff. This is one of the game’s quests that earns time spent sifting through in-world documents. You’ll also need to dig through the emails for the code to the main office computer (it’s a super secure one too: 1 2 3 4). If you have an Intelligence of 8, you won’t need the password.
Once you get access to the garage, you’ll have to deal with some hostile drones and an electrified floor. The drones don’t put up too much of a fight, but the floor will kill you fast. (The Inductor Immune System implant will make you immune to the electricity).
Take the door to your left when you enter the garage and see Johnny. You’ll need to hop on to the car that’s being raised and lowered and parkour your way over to an open vent. You’ll then have to navigate through some narrow corridors behind the cars to make it to the control room and Delamain’s core. Once inside, things get interesting.
Johnny will appear and will instantly give you a piece of his mind about what you ought to do. You’ll have three options: Restore Delamain and kill the rogue AI offshoots, merge the AI offshoots with Delamain (requires an Intelligence score of 10), or pull out a gun and destroy the core, liberating the AI offshoots but killing Delamain.
Do the AI offshoots have a right to live? Are they just an error that needs to be corrected? Should (or can) they peacefully coexist with the primary consciousness that gave birth to them? SPOILERS FOLLOW:
Johnny will appear to encourage you to destroy the core or merge all of the AIs into one. He isn’t without a point, implying that Delamain is hardly living a free life as both a taxi driver and dispatcher. Delamain admits early on in the quest that he maintains a control room strictly for the need to mirror humans, saying that such a space is an “infrastructure” he inherited, much like the visualized face he speaks through. Narratively, this is an opportunity for V to decide whether or not he’ll continue simply serving humans by sending out and driving taxis.
You are free to reset the core to purge the errant AI offshoots, which identify as Delamain’s children and seem to be fragments of his own personality. If you do this, Johnny won’t be happy and will call you out. If you lack the Intelligence score to merge the AIs, your only option then is to pull out a weapon and destroy the core.
If you have a high enough Intelligence score (10), you can access what is arguably the “good ending” for the Delamain quest guide. Once all AI personalities are merged, Delamain will express the need to leave Night City to go on to a better place. Regardless of which ending you choose, however, you will get a taxi cab of your own to drive.
Though merging the AIs seems to be the best way to go, none of these seem to scream “good/bad ending.” Instead, you’ll be left with a nice riddle about the nature of consciousness and what it means to be free. What’s more cyberpunk than that?
Delamain’s quest is easily one of Cyberpunk 2077’s most memorable side-quests. There’s some great gameplay, a ton of great dialog and narration, and it will have you traveling to different areas of the city. It’s easily the first side job to pick up once you’re out of the first Act.
More from Kotaku
Geena Davis credits Dustin Hoffman for helping her fend off Jack Nicholson
Wisconsin’s Championship Volleyball Team Had Their Private Photos Leaked Online
Formula 1's American Street Races Were Doomed to Fail From the Start
Sign up for Kotaku's Newsletter. For the latest news, Facebook, Twitter and Instagram.

