
How to get started with the Files app on Windows 11 to replace File Explorer

On Windows 11, if you're looking for an alternative to File Explorer, the Files is the app you want to use. Files (or Files App, as listed in the Microsoft Store) is an open-source file manager designed to be more modern and easier to use than the default manager built into the operating system.
In addition to the sleek design and intuitive interface, the Files app includes many of the same features as File Explorer, plus several powerful features to browse and manage files and folders on Windows 11. (The app also works on Windows 10.)
For example, in addition to a similar design with tabs, a left navigation pane, a toolbar, an address bar, and a search box, this application includes a split mode to view two folders side by side on the same window, a tagging system to organize your contents, archival support to compress and extract files like ".zip," ".rar," and ".7z."
The app also offers a modern settings interface to customize virtually every aspect of the experience, including the ability to change the appearance, customize folder views, backup and restore settings, and much more.
In this how-to guide, I'll walk you through the steps to get started with the app, from installing it to navigating the interface and highlighting the features you won't find on File Explorer.
Getting started with the Files app on Windows 11
Since this is a third-party application, you will have to get it from the Microsoft Store. After the installation, you can launch the app from the Start menu to get started. Here's how.
Install Files app
To install the Files App on Windows 11, use these steps:
Open Microsoft Store.
Search for "Files Apps" (by Yair A) and open the app's page.
Click the "Get" or "Install" button.

Once you complete the steps, the new file manager will be installed on your computer and work alongside File Explorer.
Navigating Files app
To open the Files app, open "Start," search for the app, and launch it like with any other application. (You can right-click the icon in the Taskbar and select the "Pin to taskbar" option for quicker access.)
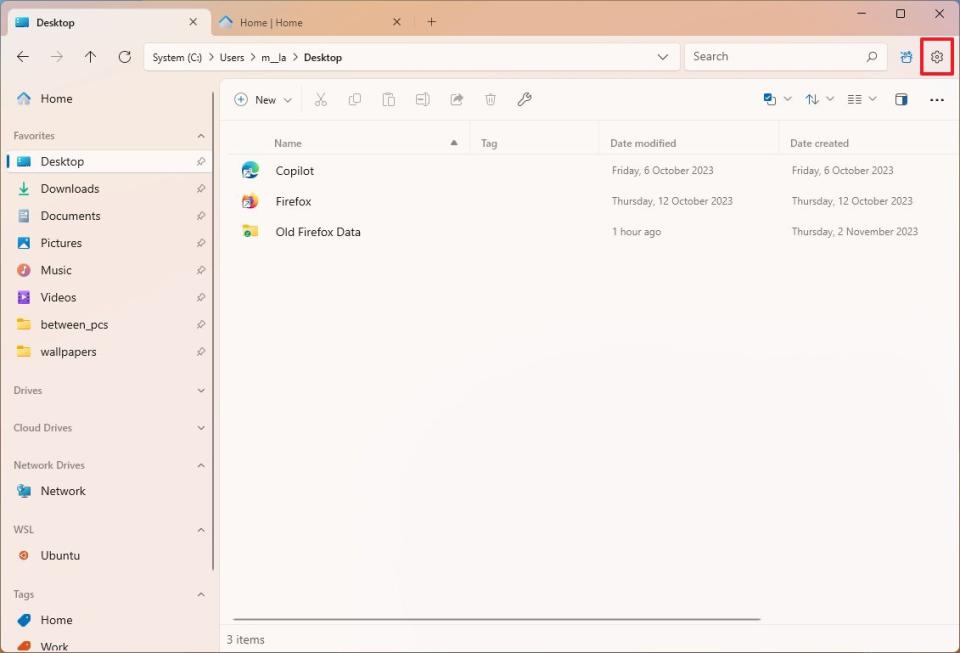
When you first launch Files, you will notice it includes an interface very similar to File Explorer, available on Windows 11, but with some elements and features that make this file manager stand out.
On the left, you'll find the navigation pane with access to the "Home" page (the default startup page) and access to "Favorites" locations, "Drives," and "WSL."
File Explorer only integrates with OneDrive, but Files integrates with many cloud storage services, such as OneDrive, Apple's iCloud, and Google Drive. (You only need to have the storage client already installed on the device to appear under "Cloud Drives." If you install the sync client after adding Files, you may need to restart the computer.)
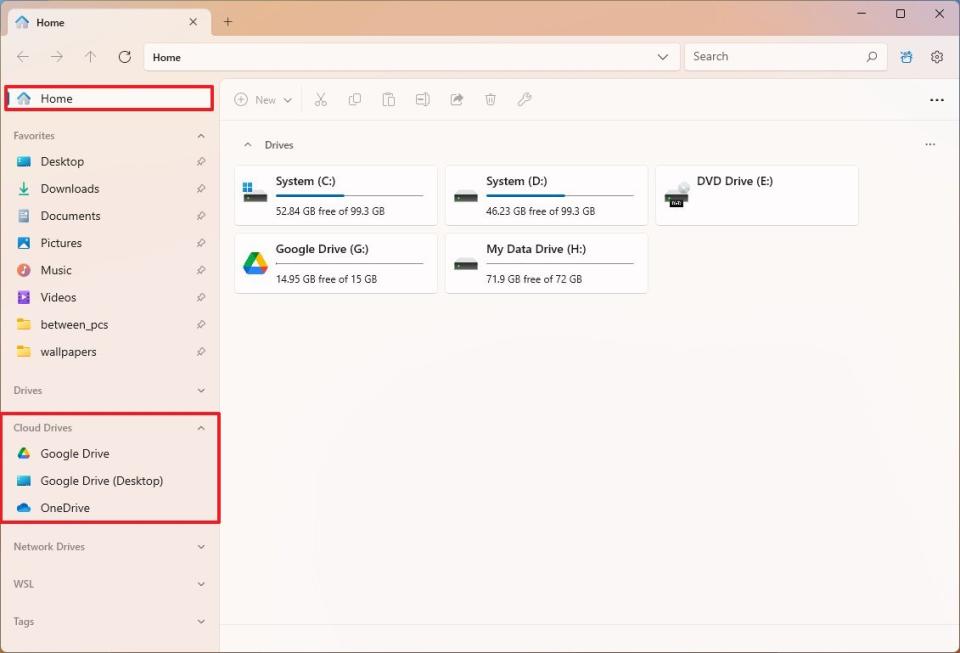
Also, under "Tags," you can navigate those files that added tags from the item's properties.
At the top, you can open and close tabs. You can drag tabs out to create another window, but you cannot drag a window into another window to convert it into a tab.
As part of the header, on the left side, you have navigation controls (back, forth, up, and refresh), an address bar to browse any location, and a search box. One difference from File Explorer is that Files includes an option (gear button) on the right to access the settings page.
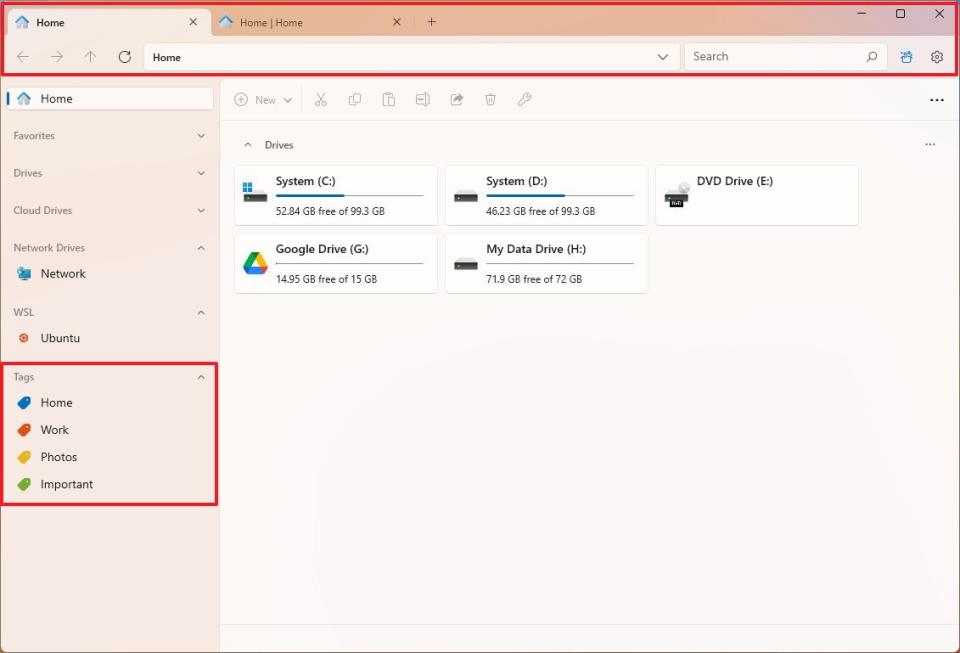
Immediately beneath the header, you will find the toolbar with all the common features, such as cut, copy, rename, paste, share, delete, and access to the file or folder properties.
On the right side, Files includes the options to sort content, change the layout, and open the preview pane on the right side.
Finally, at the bottom, you will find information about the location, including the number of items in the current view, the number of selected items, and their size.
If you know your way around File Explorer, you already know the basics to get around Files.
Files also support mounting network drives from the "Home" page.

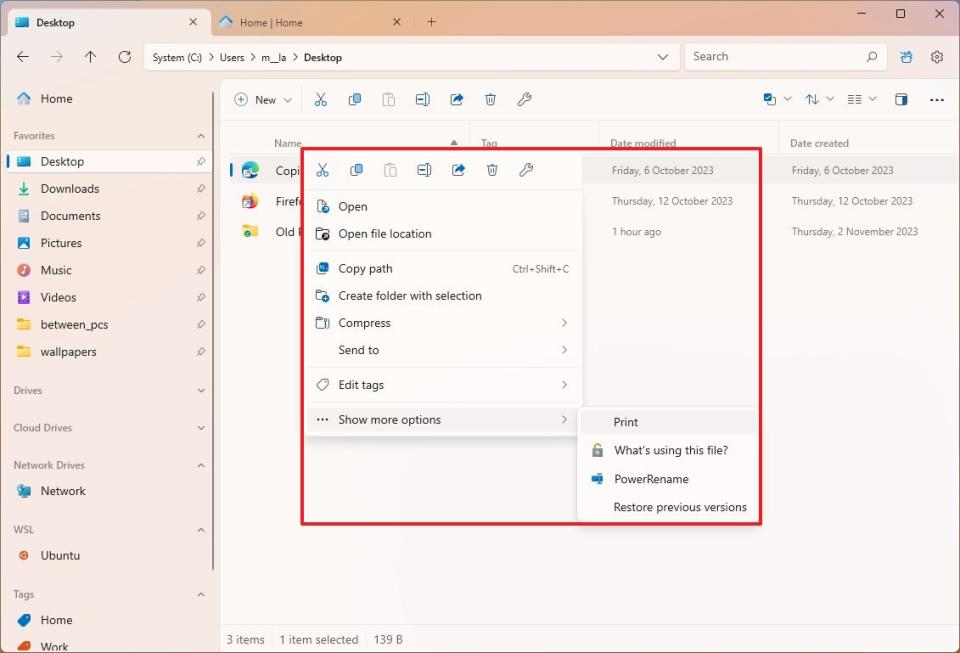
Furthermore, the context menu available with Files is more advanced than the one on File Explorer. For example, when you right-click an executable, the menu offers more options, including running the application as a different user. The "Show more options" is a submenu with access to other options instead of switching to the legacy context menu like on File Explorer.
Change general settings
To change some of the behaviors of the app, including startup, context menu, and widgets, use these steps:
Open Files.
Click the Settings (gear) button on the top-right corner.
Click on General.
Use the "Startup settings" option to choose whether the file manager should always launch on a new tab, continue where you left off, or use a specific location or drive.
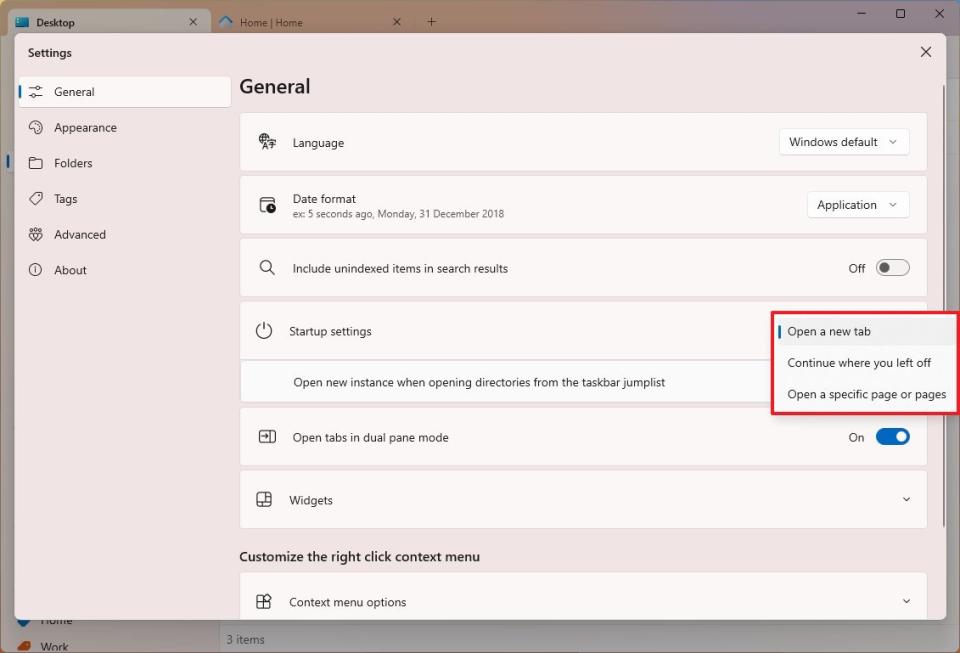
Quick note: If you select a specific location, you will have the option to browse and choose the new location.
Use the "Widgets" setting to decide the items ("Quick access," "Drives," "Tags," and "Recent files") to display on the "Home" page.
Use the "Context menu options" setting to customize some of the items in the context menu (such as new tab, window, and pane).
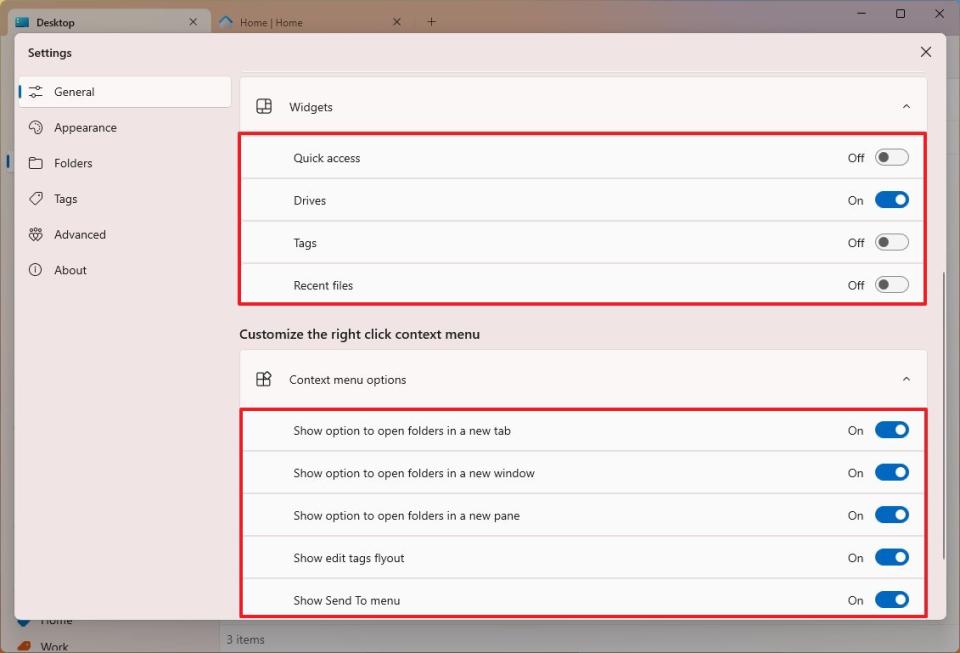
Quick note: The "Move shell extensions into a submenu" shows every possible item on a scrollable menu instead of a submenu.
After you complete the steps, the settings will apply according to your configuration.
Customize appearance
To change the appearance of the Files app, use these steps:
Open Files.
Click the Settings (gear) button in the top-right corner.
Click on Appearance.
Choose the color mode, including "Dark," "Light," or "Default" (matches the system color mode) from the "Theme" setting.
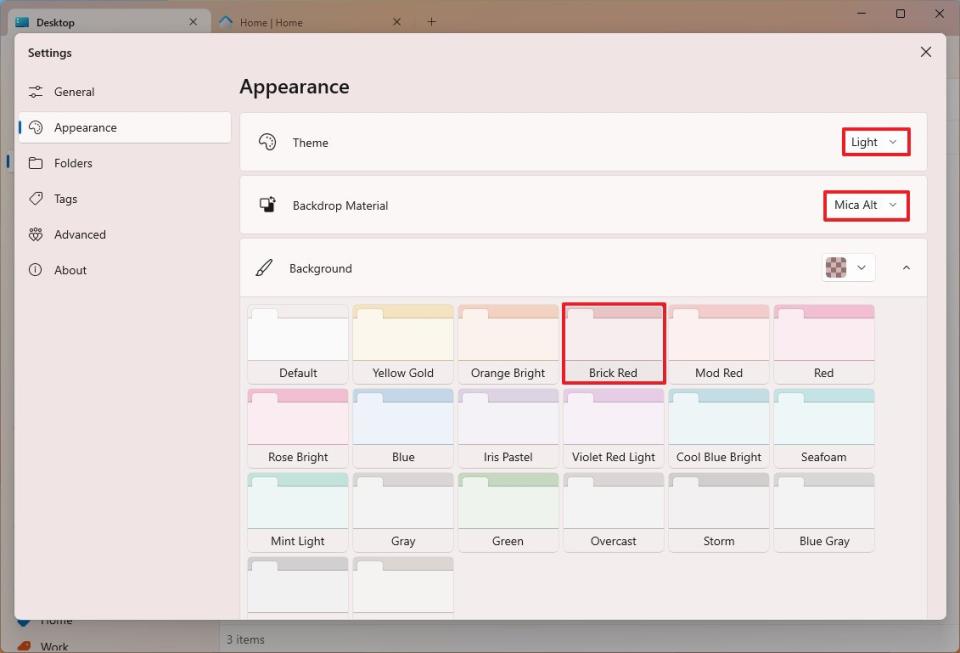
(Optional) Select the style design technology, including "Mica Alt" or "Acrylic."
Choose one of the colors to change the color of the entire interface using the "Background" setting.
Once you complete the steps, the new customization settings will apply to the file manager.
It's important to note that the Files app will use the Windows 11 accent color for some elements, such as icons and buttons, across the experience.
Set Files as system default
To make the Files app the default file manager on Windows 11, use these steps:
Open Files.
Click the Settings (gear) button in the top-right corner.
Click on Advanced.
Under the "Experimental features flags" section, turn on the "Set files as the default file manager" toggle switch.
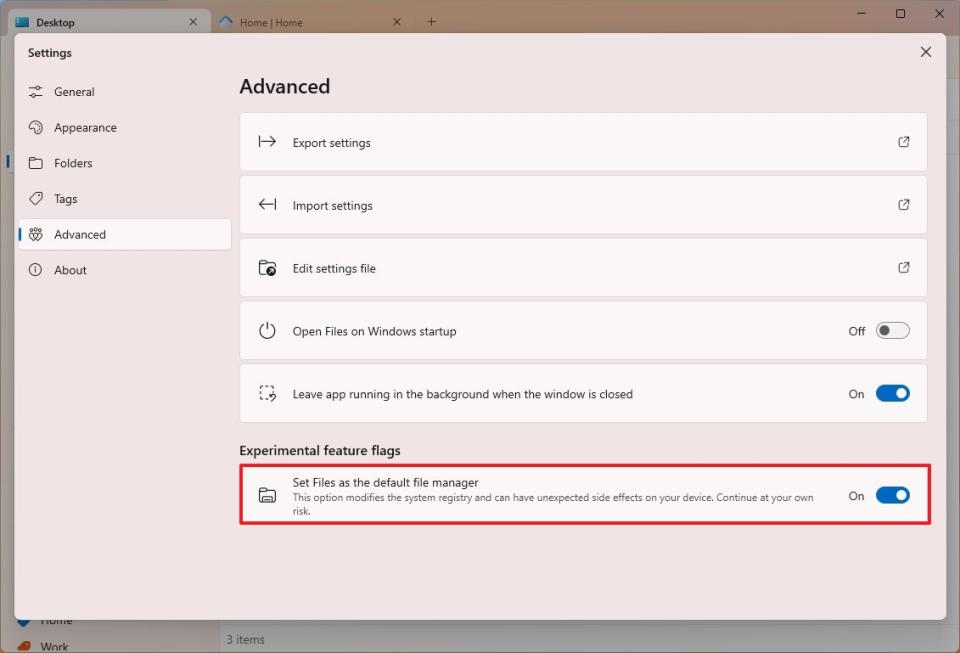
After you complete the steps, Windows 11 will make Files the new default experience to manage files. However, this action will not uninstall File Explorer.
Export and import settings
One of the advantages of the Files app is that you can back up and restore the settings on the same or another computer.
Export settings
To export the Files app settings on Windows 11, use these steps:
Open Files.
Click the Settings (gear) button in the top-right corner.
Click on Advanced.
Click the Export settings option.

Select the location to save the application configuration file on your computer.
Click the Save button.
Once you complete the steps, the application will export the entire configuration in a ".zip" file that you can save to restore or take the settings to another computer.
Import settings
To import the file manager settings, use these steps:
Open Files.
Click the Settings (gear) button in the top-right corner.
Click on Advanced.
Click the Import settings option.
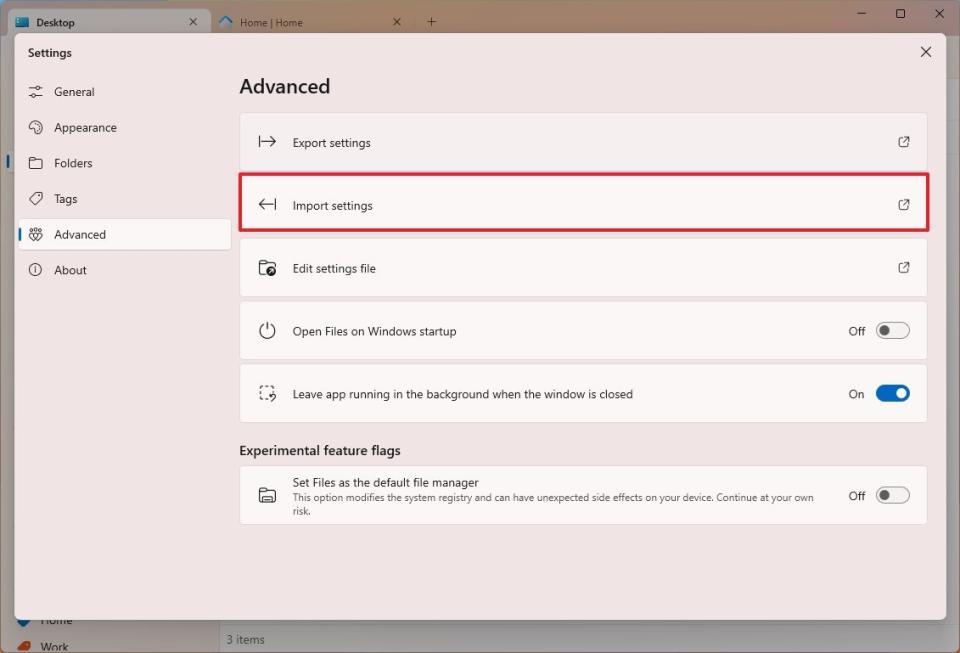
Select the configuration file from your computer.
Click the Open button.
After you complete the steps, the settings will import automatically. It's not required to restart the app, but it's recommended.
Organize files and folders with tags
Although you can use tags on File Explorer, they are only meant for searching for files. The Files app includes a tagging system that allows you to set specific tags to any file or folder and quickly access these contents from the navigation pane, similar to the feature available on macOS.
The app comes with four tags by default, including "Home," "Work," "Photos," and "Important," but you can add as many tags as you need.
To tag a file or folder, right-click the item, open the "Edits tags" submenu, and choose the tag. To add or remove tags, use these steps:
Open Files.
Click the Settings (gear) button in the top-right corner.
Click on Tags.
Click the New tag button.
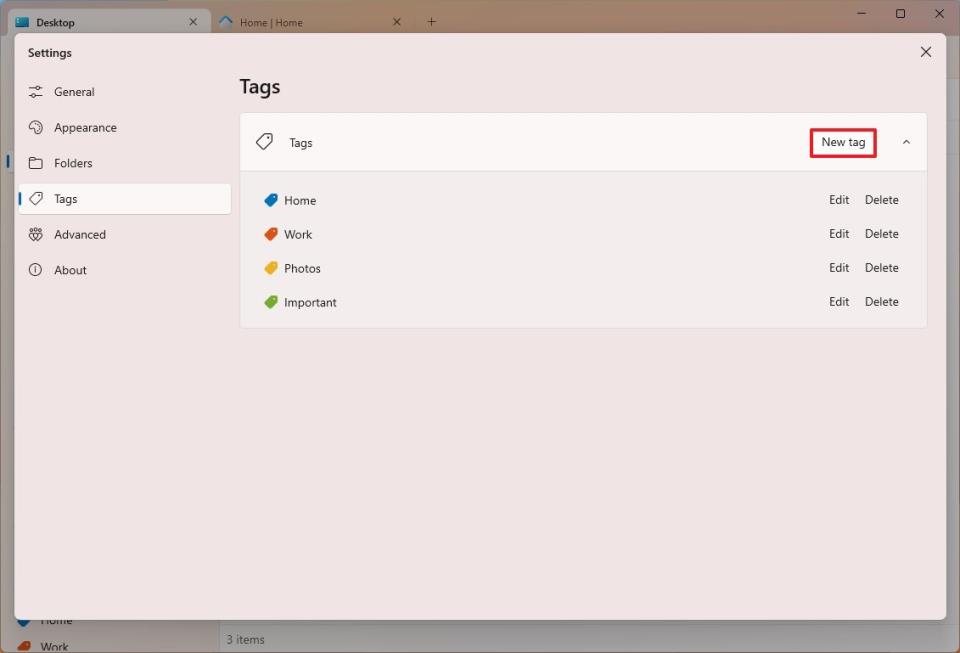
Confirm a name and color for the tag.
Click the Create button.

(Optional) Click the Edit button to change the tag's name.
(Optional) Click the Delete button to remove a tag.
Once you complete the steps, you can start tagging documents, files, and folders.
Customize folder view
When using the Files app, you can customize the view for each location using the "Layout," "Sort," and "Selection options."
The "Layout" menu gives you the option to change the view, similar to File Explorer, using details, tiles, and different sizes of icons. The "Columns" option allows you to drill between folders in columns, similar to Finder on macOS.

You can also show or hide extensions, show hidden files, and use the "Adaptive layout" that allows the app to adjust its layout to fit different screen and window sizes automatically.
The "Sort" menu allows you to sort and group content based on different criteria.
Finally, the "Selection options" can be used to select items.

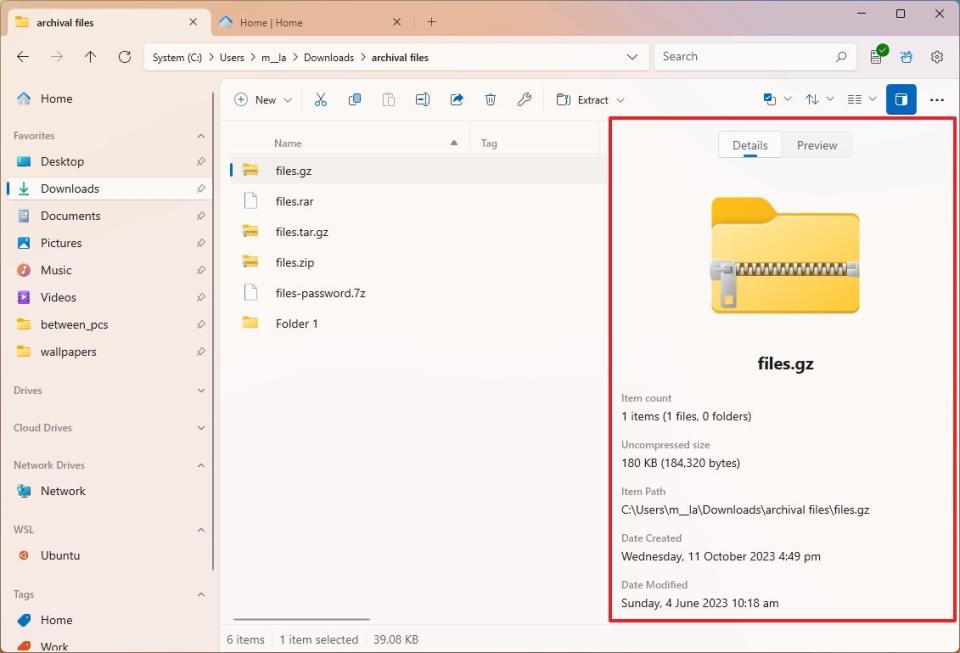
The "Preview" feature is the equivalent to the "Details" page on File Explorer, and it allows you to show details about the files and preview the contents of an item.
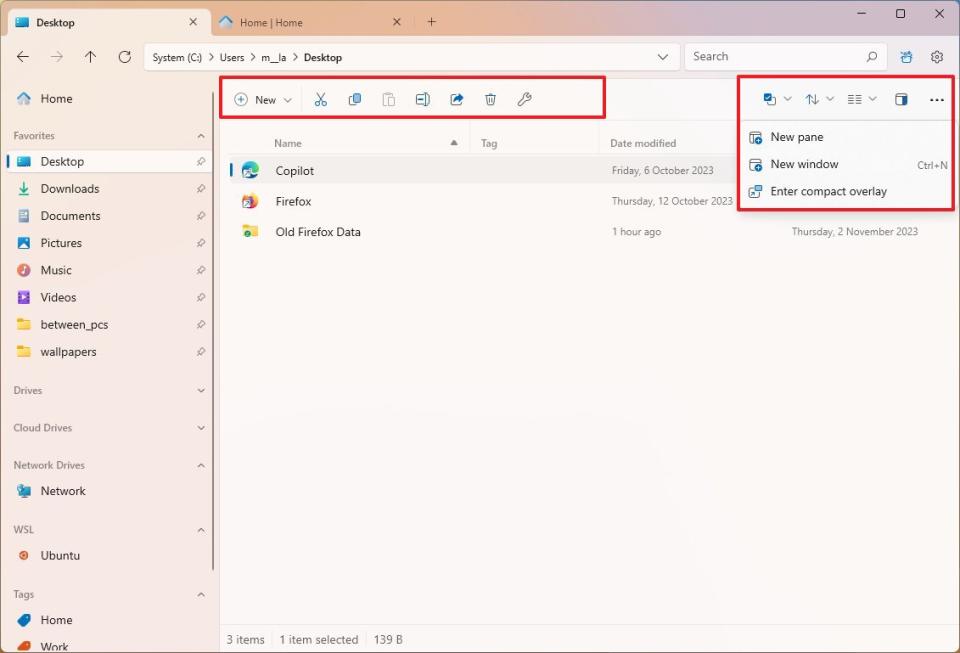
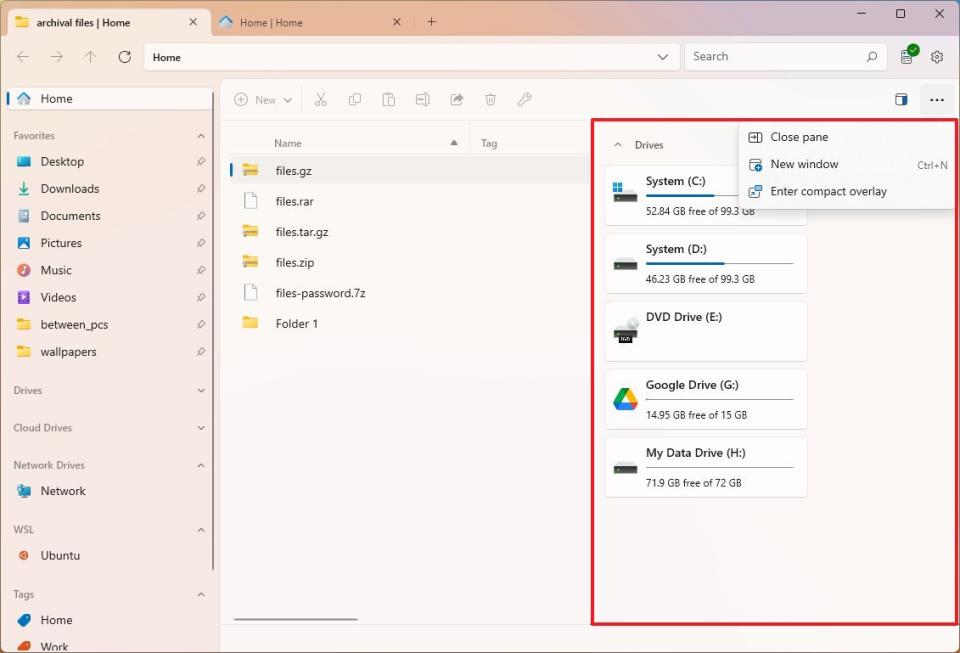
The "See more" (three dots) menu in the top right allows you to open a new pane or window or turn the compact overlay on or off.
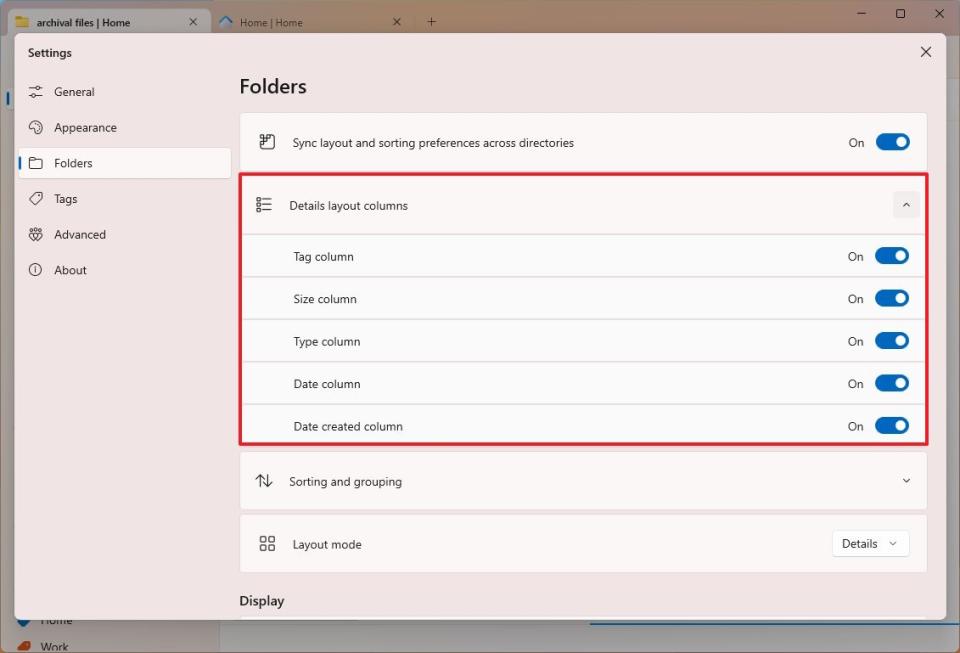
In addition to these controls, the file manager allows you to manage the folder views through the Settings > Folders page.
On this page, you can sync the layout and sorting configurations across folders globally.
The "Details layout columns" settings allow you to determine the information available using the "Details" layout. For example, you can show or hide tags, sizes, dates, etc.
Similarly, the "Sorting and grouping" settings allow you to configure some default settings for sorting and grouping. For example, you can set the default "Sort by" and "Group by" options.

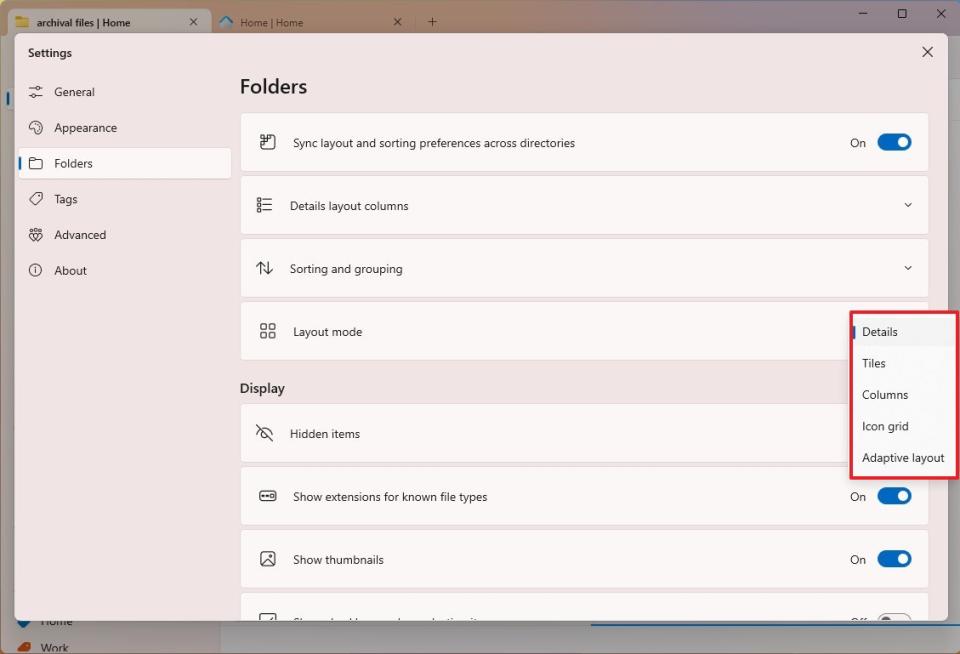
You can also use the "Layout mode" setting to choose the default mode, including "Details," "Tiles," "Columns," "Icon grid," and "Adaptive layout."
Under the "Display" settings, you can configure hidden items and extension preferences, manage thumbnails, and more.
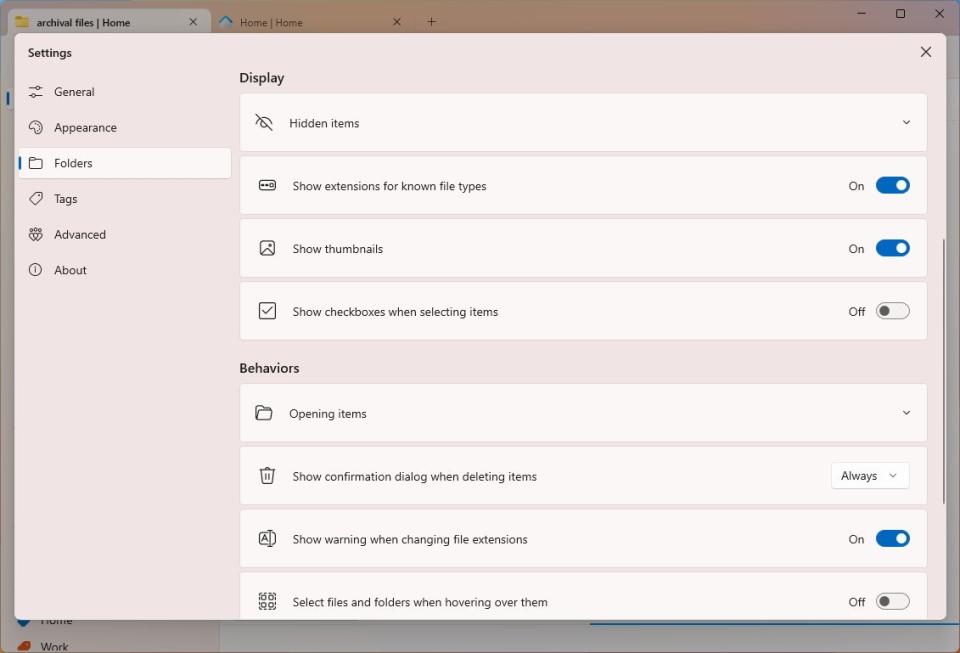
Finally, under the "Behaviors" section, you can control the action of opening items (double or single click), disabling deletion confirmation, and warning changing extensions.
Some other unique options include the ability to select files and folders when hovering and double-click a blank space to go up a folder.
Open and extract archival formats
The Files app offers support for compressing and extracting files using ".zip," ".rar," and ".7z" using a 7-zip integration.
Starting on Windows 11 version 23H2 through the integration of the "libarchive" open-source project, File Explorer now supports viewing and extracting ".zip," ".rar," and ".7z" archival formats.
The difference with the integration in the Files app is that you can also create archival formats and even extract files with encryption, since there's an option to confirm the password to access the contents.
Extract archival format
To open and extract archival formats through Files, use these steps:
Open Files.
Open the folder containing the archival formats.
Double-click the ".zip," ".rar," or ".7z" file format to open its content.
Click the Extract button from the toolbar and select the Extract files option.
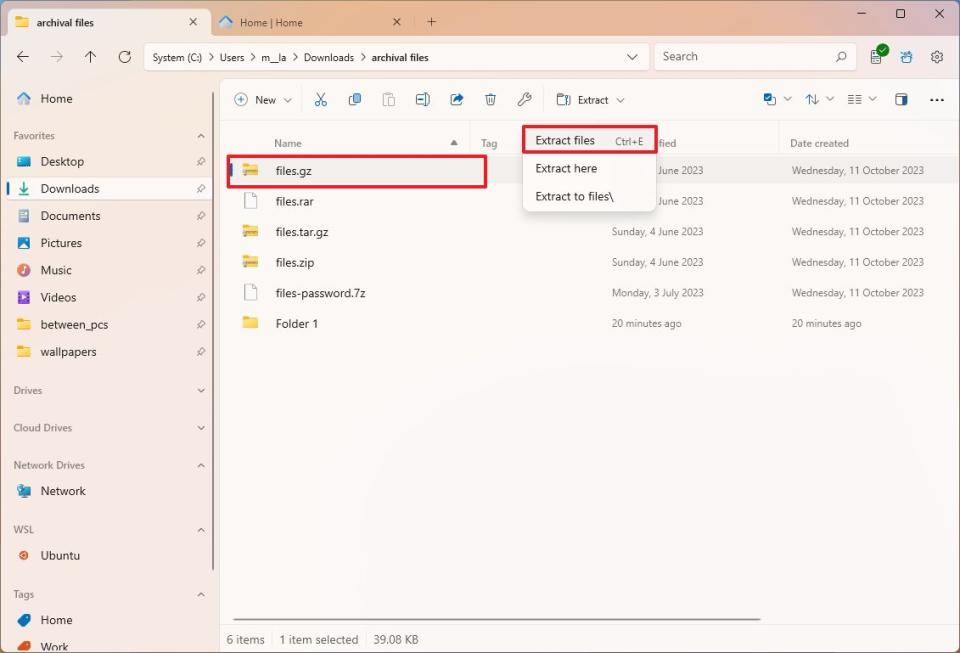
Confirm the extraction path.
Confirm the archival password (if necessary).
Check the "Open destination folder when complete" option.
Click the Extract button.

Once you complete the steps, the process will begin, and the file manager will present the location with the extracted content.
Create archival format
To create a ".zip" or ".7z." archival with Files, use these steps:
Open Files.
Open the folder containing the files and folders.
Select the items.
Right-click the selection, choose Compress, and select the Create archive option.

Confirm a name for the archival.
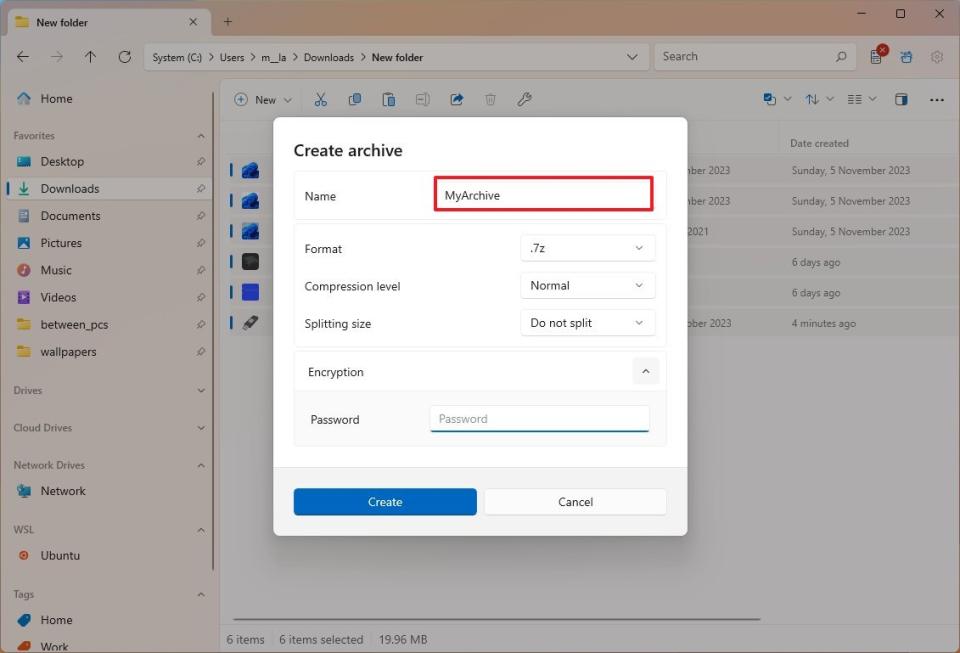
Select the format, either ".zip" or ".7z."
Choose the compression level (if applicable).
Quick note: The default section is almost always recommended.
(Optional) Configure the split side.
Quick note: The "Splitting size" option allows you to break a large file into smaller pieces.
(Optional) Choose an encryption password.
Click the Create button.
After you complete the steps, Files using 7-zip will start the compression of the files.
The Files app is an excellent alternative for those who want a more modern and different (but yet similar) file manager experience. It's a fantastic app, considering that it's an open-source project, and it includes all the essential tools that you come to expect, plus many additional features that make Files stand out over File Explorer. For example, in my opinion, the interface has a more well-done design, and the integration of archival formats seems more mature than one in File Explorer.
Although Files is a solid alternative for Windows 11 (and 10) users, while I was testing and writing this guide, I noticed that it is slower in some tasks compared to File Explorer. For example, thumbnails take longer to load, and the overall browsing experience is a bit sluggish.
More resources
For more helpful articles, coverage, and answers to common questions about Windows 10 and Windows 11, visit the following resources:

