How to get started with Microsoft Designer on Windows 11
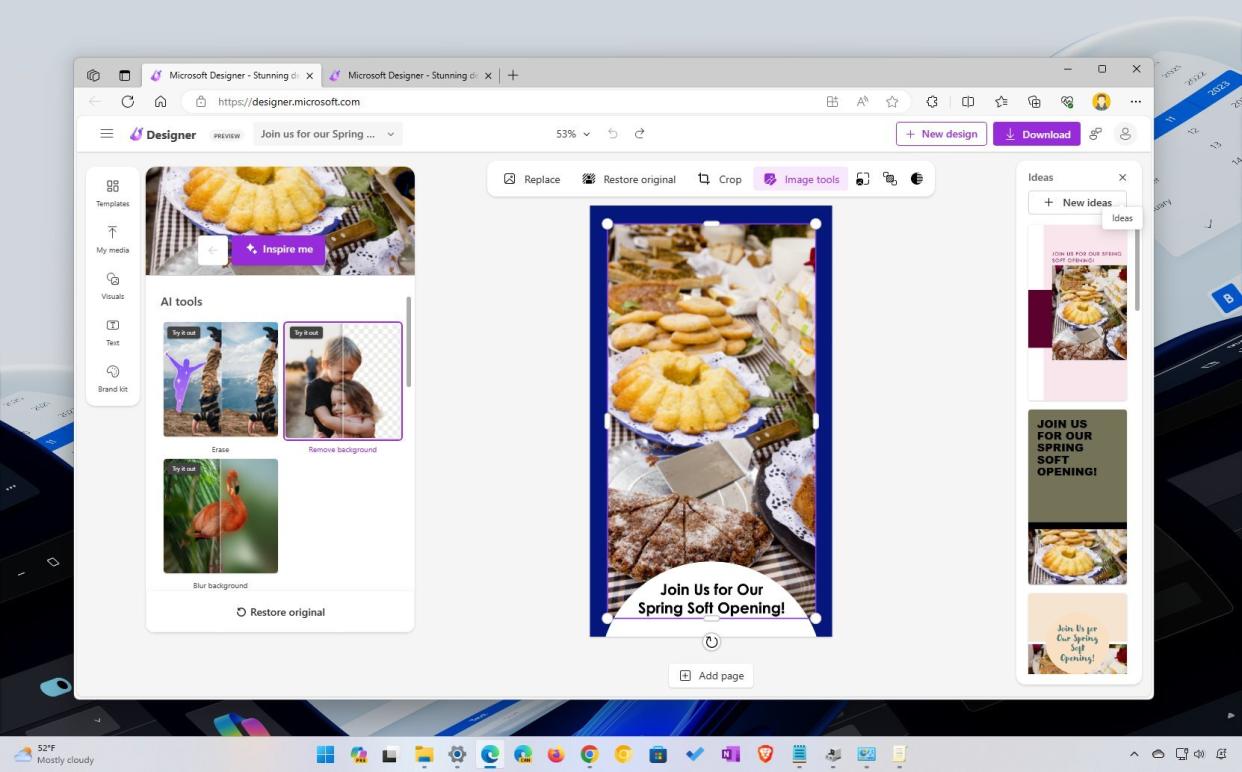
Microsoft Designer is a graphic design web application that anyone can use to create different graphics for various purposes, including social media posts, postcards, invitations, and more quickly and easily.
The application offers two ways to create graphics, including through AI using the integration of the DALL-E language model from OpenAI that converts text descriptions into images, or you can also choose a blank page and use the available features to create a specific image from scratch.
This how-to guide will walk you through the steps to get started with the Microsoft Designer on Windows 11, but since it's an online tool, you can refer to these steps from any computing platform using a web browser.
Get started with Microsoft Designer
The process of getting started with Designer begins with accessing the web application, choosing the creation method, and using descriptive text to generate an image with AI or using the available tools to create the exact graphic you need.
Access Designer with a Microsoft account
Microsoft Designer doesn't have an application for Windows 11, so you must access the service online using your Microsoft account. Alternatively, you can download the web app that brings web experience to the desktop from the Microsoft Store.
At the time of this writing, you can access the web app for free during the preview period. However, it's unclear whether or not it'll become an exclusive component of the Microsoft 365 subscription or if it will be free with limited functionalities without a subscription.
To sign up and access Microsoft Designer, you can use this link.
Create a design with AI
Once you sign in with your account, you will notice a prompt box and graphics samples on the right. The box lets you input a descriptive text of your desired image design. You can also click the "Add media" option to upload one or multiple images to create a graphic based on that image.
On the page, there's also a "Generate image" option that also offers random suggestions for prompts that you can use to create an image.
If you're not sure about the graphics you want, choose one of the samples from the right to create a prompt (that you can modify), and click the "Generate" button.

On the right, you can pick one of the suggestions or refine the prompt until you get the design you want. Once you find the best design, select it and click the "Customize design" button to open it with the Microsoft Designer editor.

In the main interface, you have the toolbar at the top with a drop-down menu with different settings, including starting a new design or browsing previous designs, and you can duplicate, resize, or rename.
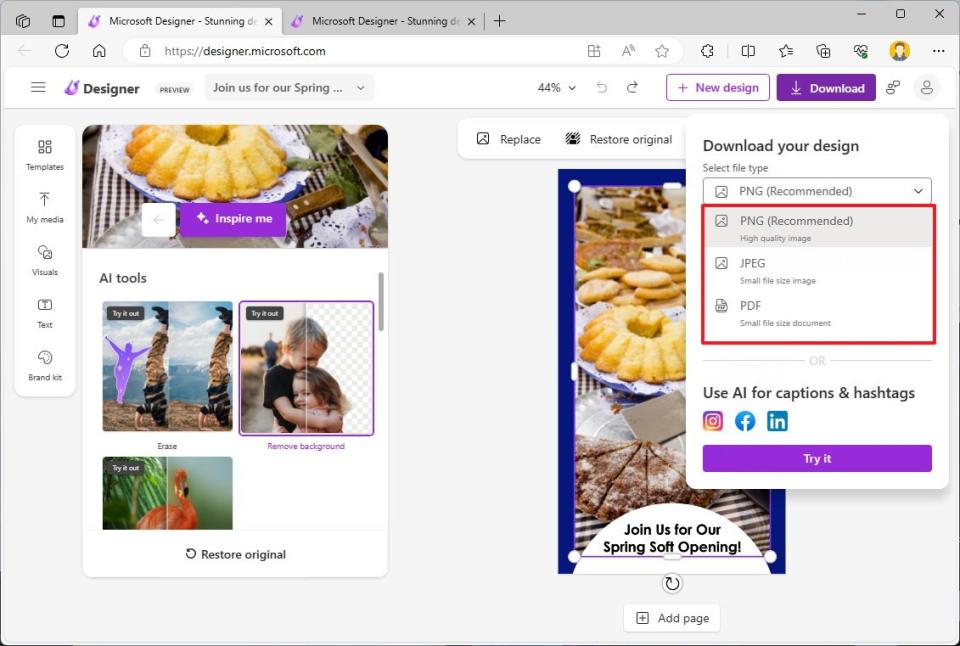
In the center, you will find controls to zoom, undo, and redo, and on the right, you also have the option to start a new design and download the final version of the graphic as a ".png," ".jpg," or ".pdf."

The canvas also offers various tools. On the right side, there's an "Ideas" flyout with alternative suggestions to the current design you're editing.
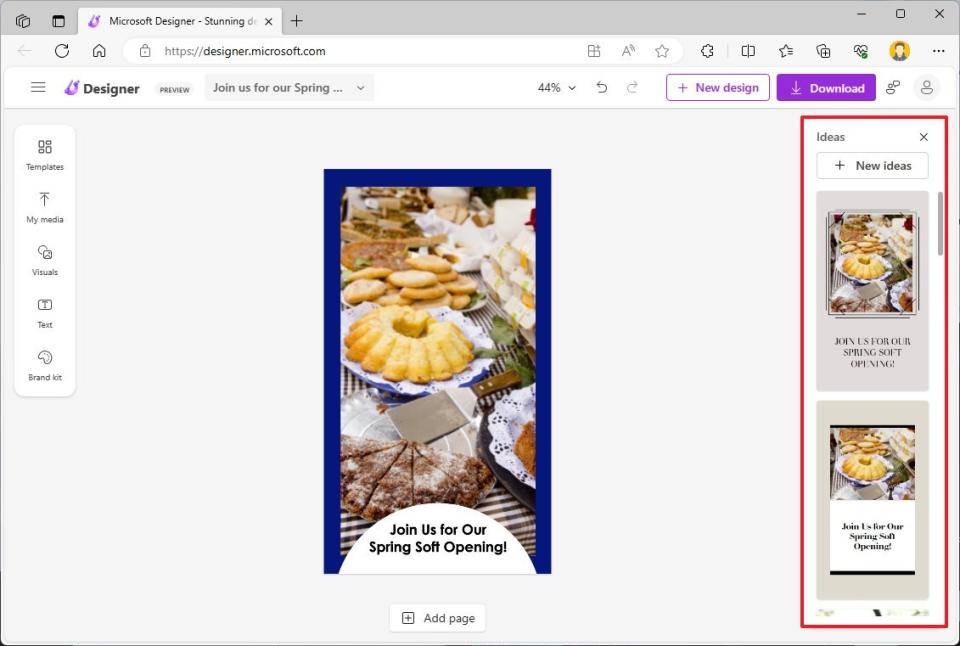
On the left side, you will find different tools you can use to edit the current design created with AI or when using a blank page, including "Templates," "My media," "Visuals," "Text," and "Brand kit."
The "Templates" option allows you to change the entire design of the graphics, and doing so will also update the "Ideas" suggestions.

The "My media" option allows you to upload images from your computer, phone, or online storage services.
The "Visuals" option includes recommendations based on the current design, shapes, icons, videos, and more. Also, the "Generate" tab allows you to use the DALL-E model to create AI images from a text prompt.
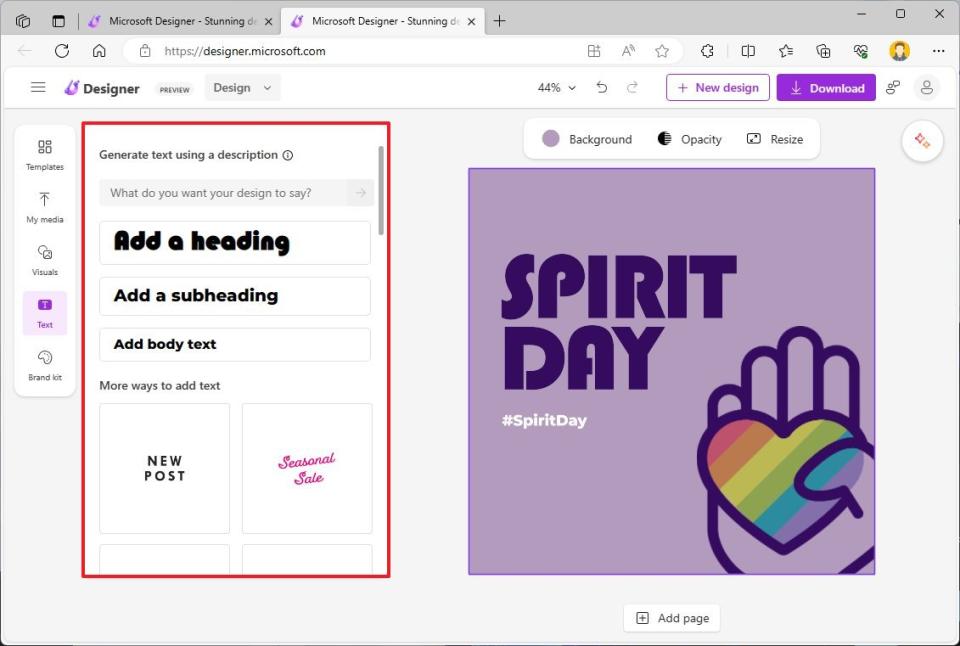
The "Text" option includes all the font-related settings, such as the ability to insert messages with different fonts and sizes.
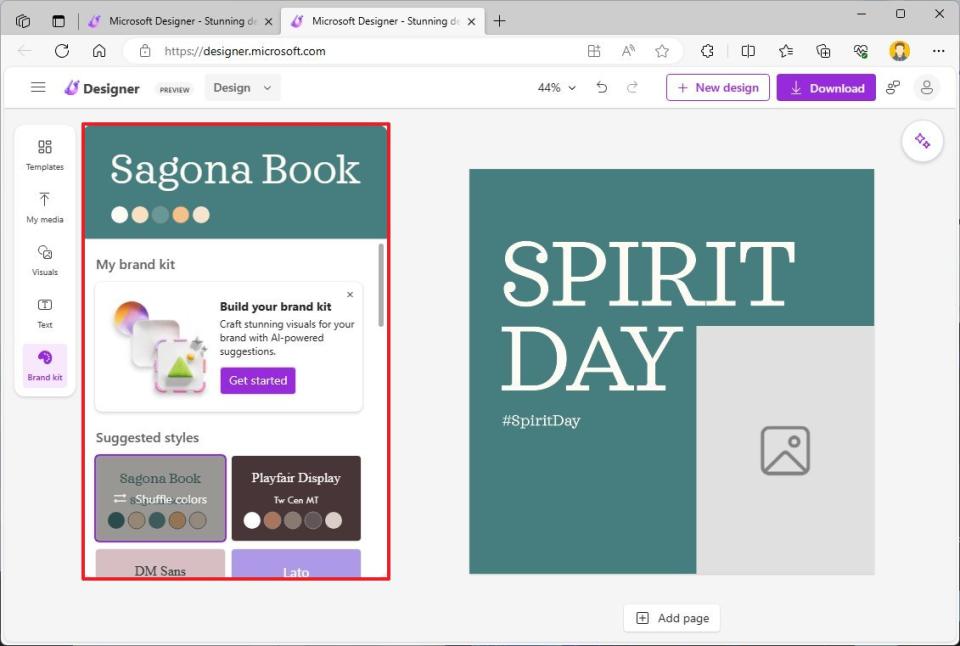
The "Brand Kit" offers different color patterns and fonts that you can use to change your design quickly. You will also find the "Generate" option to create custom kits.
If you're using a template you created with AI, you likely have most of the work done, and the only thing left is to fill up the gaps and change a few elements.
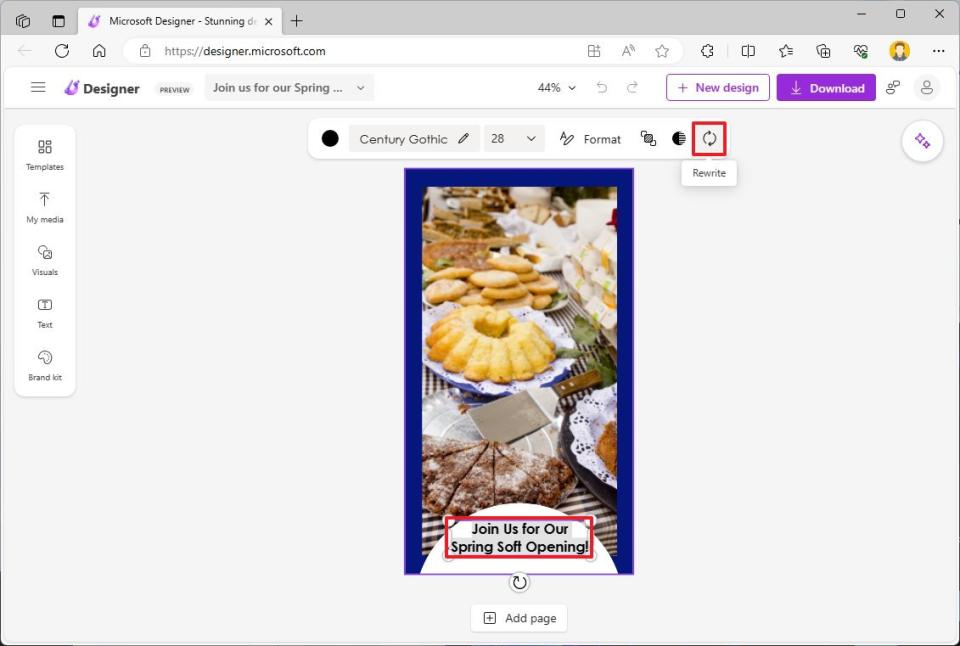
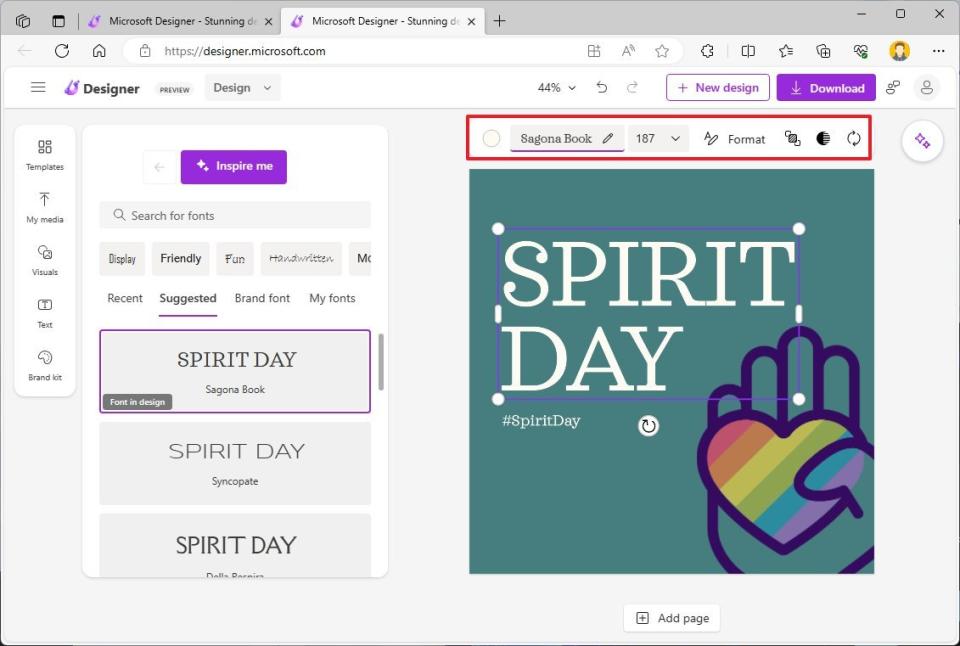
For example, to edit the text, select the block to bring up the contextual menu with related tools to change the font style, size, position, and more. The menu even includes a "Rewrite" option to improve the text on the design using AI.
If you select an image, the menu will surface tools to change the background, replace the image, crop, rotate, and more.
In the case that you're working with a picture, you can choose the "Image tools" option to access AI tools to remove objects or the entire background from the image, or you can also blur the background.
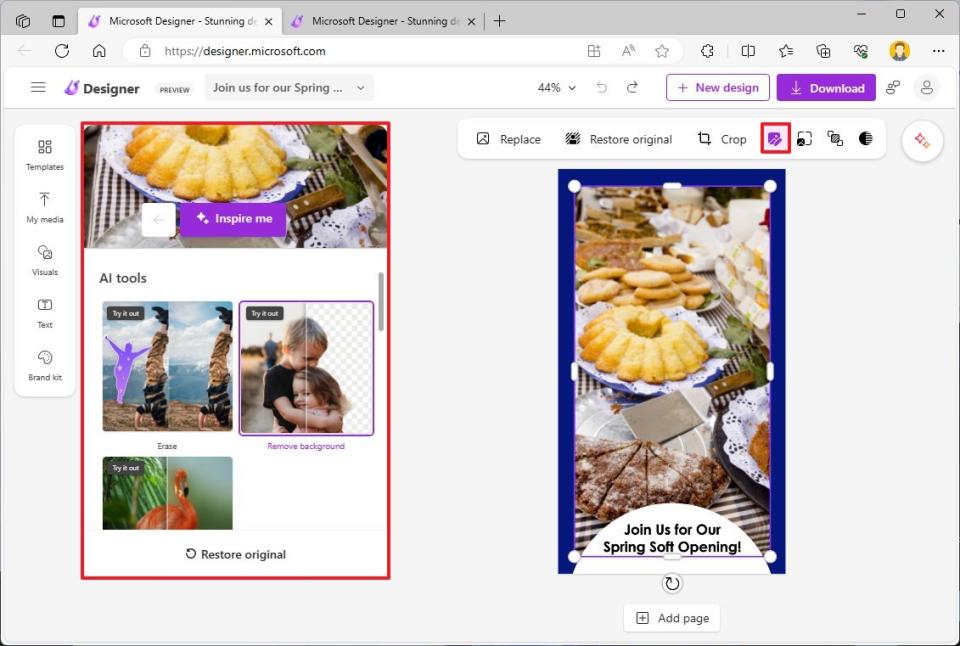
The tools also include filters and other options to edit the picture you're using in the project.
Once you are done creating, click the "Download" button to save the image on your computer or share it through social media platforms. Regardless of your save option, Designer will always keep your designs in the cloud, which you can access from the top-left menu.
Create a design from scratch
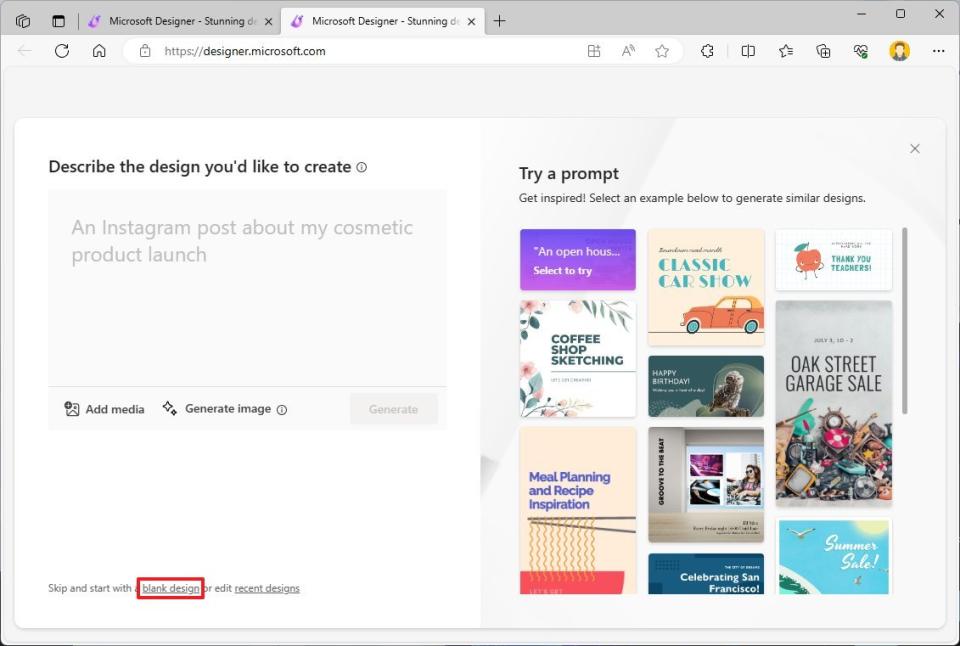
If you don't want to use AI to get inspired to build a design, you can always create a blank page. After you sign in with your account, you can click the "blank design" option, choose the size for the canvas, and then you can start designing.
Since you're starting from scratch, this is when the tools from the left side will come in handy.
You can start from the "My media" tab, as it allows you to upload images from your computer, phone, or online storage services to create your design.

In addition, you can use the "Visuals" tab for shapes, icons, videos, and more, and inserting these elements is as easy as dragging and dropping.

If you need to add a caption, the "Text" tab includes font-related settings, such as the ability to insert messages with different fonts and sizes.
The "Brand Kit" offers different color patterns and fonts that you can use on your design. You will also find the "Generate" option to create custom kits.
Similar to editing an AI image, you can edit every element you drop on the design. For example, as you drop a picture, you will notice a set of tools to change the background, replace the image, crop, rotate, and more. If you're working on a shape, you will see the tools edit that particular element. Also, if you are using text, selecting the block brings up the contextual menu with related tools to change the font style, size, position, and more. The menu even includes a "Rewrite" option to improve the text on the design using AI.
If you're having issues coming up with a design idea, you can always click the "Ideas" button from the top-right to step back and use AI to create a base design.
After you are done with the design, click the "Download" button to save the image on your computer or share it through social media platforms.
More resources
For more helpful articles, coverage, and answers to common questions about Windows 10 and Windows 11, visit the following resources:


